

Due to the pandemic, everyone has begun to embark on new endeavors to keep themselves busy and their minds occupied during a time of turmoil for many. Numerous aspiring bakers have surfaced of social media and turned to make their own sourdough— so much so that it’s become a joke in national commercials and is also circulating the online meme circuit.
All pop culture references and jokes aside, bread baking is a valuable skill that can last forever, and if you feel like you have the extra time to learn something new, then why not take a chance at this exciting skill? Of course, you want to hop on the sourdough bandwagon with everyone to begin your new venture –but did you know that this type of bread requires something called a Sourdough Starter?
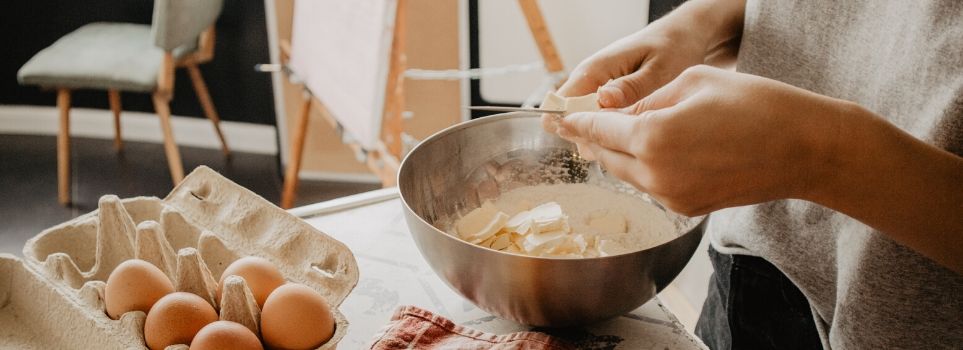
That’s right—sourdough baking is as much of an art as it is a science. And, the Sourdough Starter Recipe we’re sharing today is from the reigning royalty of bread baking, King Arthur Flour. Their unique, tried-and-true method has stood the test of time, and that’s why we’re happy to pass it along. Now, it’s time to rev up your ovens and get ready to make King Arthur Flour’s very own Sourdough Starter recipe.
To Begin Your Starter:
• 1 cup (113g) whole rye or pumpernickel wheat flour
• ½ cup (113g) cool water
To Feed Your Starter:
• Scant 1 cup (113g) King Arthur Unbleached All-Purpose Flour
• ½ cup (113g) cool water (if a house is warm), or lukewarm water (if your house is cool)
Instructions:
1. Day 1: Combine the pumpernickel or whole rye flour with the cool water in a non-reactive container. Glass, crockery, stainless steel, or food-grade plastic all work fine for this. Make sure the container is large enough to hold your starter as it grows; we recommend at least 1-quart capacity.
2. Stir everything together thoroughly; make sure there's no dry flour anywhere. Cover the container loosely and let the mixture sit at warm room temperature (about 70°F) for 24 hours.
3. Day 2: You may see no activity at all in the first 24 hours, or you may see a bit of growth or bubbling. Either way, discard half the starter (113 grams, about 1/2 cup), and add to the remainder a scant 1 cup (113 grams) King Arthur Unbleached All-Purpose Flour, and 1/2 cup (113 grams) cool or lukewarm water, depending on the temperature of your home.
4. Mix well, cover, and let the mixture rest at room temperature for 24 hours.
5. Day 3: By the third day, you'll likely see some activity — bubbling. It's now time to begin two feedings daily, as evenly spaced as your schedule allows. For each feeding, weigh out 113 grams starter; this will be a generous 1/2 cup, once it's thoroughly stirred down. Discard any remaining starter.
6. Add a scant 1 cup (113 grams) King Arthur Unbleached All-Purpose Flour, and 1/2 cup (113 grams) water to the 113 grams starter. Mix the starter, flour, and water, cover, and let the mixture rest at room temperature for approximately 12 hours before repeating.
7. Day 4: Weigh out 113 grams starter, and discard any remaining starter. Repeat step #6.
8. Day 5: Weigh out 113 grams starter, and discard any remaining starter. Repeat step #6. By the end of day #5, the starter should have at least doubled in volume. You'll see lots of bubbles; there may be some little "rivulets" on the surface, full of finer bubbles. Also, the starter should have a tangy aroma — pleasingly acidic, but not overpowering. If your starter hasn't risen much and isn't showing lots of bubbles, repeat discarding and feeding every 12 hours on day 6, and day 7, if necessary — as long as it takes to create a vigorous (risen, bubbly) starter.
9. Once the starter is ready, give it one last feeding. Discard all but 113 grams (a generous 1/2 cup). Feed as usual. Let the starter rest at room temperature for 6 to 8 hours; it should be active, with bubbles breaking the surface.
10. Remove however much starter you need for your recipe — typically no more than 227 grams, about 1 cup. If your recipe calls for more than 1 cup of starter, give it a couple of feedings without discarding, until you've made enough for your recipe plus 113 grams to keep and feed again.
11. Transfer the remaining 113 grams of starter to its permanent home: a crock, jar, or whatever you'd like to store it in the long-term. Feed this reserved starter with 1 scant cup (113 grams) of flour and 1/2 cup (113 grams) water, and let it rest at room temperature for several hours, to get going, before covering it. If you're storing starter in a screw-top jar, screw the top on loosely rather than airtight.
12. Store this starter in the refrigerator, and feed it regularly; we recommend feeding it with a scant 1 cup (113 grams) flour and 1/2 cup (113 grams) water once a week.
Although we provide the utmost luxury at Westmount at Copper Mill Apartments in Houston, Texas, we love going the extra mile with our digital resources! Spice up your life with something different, and try out this new routine, recipe, or recommendation today.