

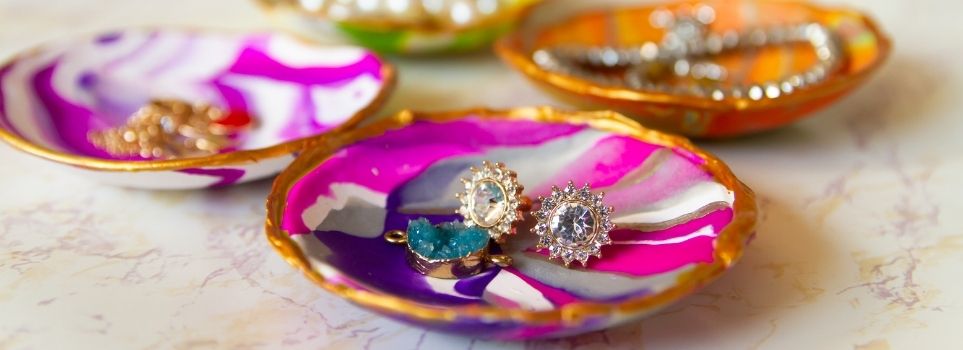
This DIY project idea for Scalloped Clay Jewelry Dishes comes from our friend Anusha Rajeswaran of the Fish & Bull blog, named after the animals of her and her husband’s astrology signs, Pieces and Taurus. Having not grown up in an affluent home, Anusha and her mother would decorate their house from scratch, and we, at Westmount at Copper Mill Apartments, encourage you to do the same in your apartment home in Houston, Texas. Here's how to make a clay dish with a pretty scalloped edge and decorative motif using temporary tattoos. Rings, necklaces, earrings, and even keys and coins — these small, but purposeful dishes will serve as a catch-all for everything. Check out the materials and instructions:
Materials:
• Oven-bake polymer clay
• Scallop-edged cookie cutter
• Rolling pin
• Small oven-safe bowl
• Polymer varnish
• Paintbrush
• Temporary tattoos
• Sponge
Instructions:
1. Roll your clay in the palm of your hands to form a ball. On a clean working surface, roll the clay to about 1/4 inch thickness with a rolling pin.
2. Using a scallop-edged cookie cutter, punch out circles from the clay.
3. Apply a temporary tattoo to the clay. Trim the edges around the tattoo design, peel the shiny film off and gently apply the tattoo face-down on the clay.
4. Place the circle of clay into a small oven-safe bowl to create a soft bowl shape. Dampen the back of the tattoo and apply light pressure. Slowly peel the paper away or slide it off.
5. Bake the clay in the oven-safe bowl according to package instructions. We recommend 200 degrees F for about 10 minutes.
6. Let cool completely, then apply a layer of polymer varnish to the tattoo design or the entire dish to seal and protect it.
Want to lead a life well-lived? Start by engaging your mind with interesting, informative material, as these tips and tricks from Westmount at Copper Mill Apartments in Houston, Texas!